One of the powerful options in the Axeos pbx is queue callback: this feature allows any caller waiting in a queue to request a callback and wait for an agent to return their call.
In this article we will show you how to set this up for your call queue(s). We assume you have basic knowledge of call queues, IVR’s and the Call-me-back-option.
Want to read more about ACDs and IVRs and how to set it up? Go directly to:
- Call queues (general information)
- ACD (for admins)
- IVR
- How to set up Call-me-back.
Set up ACD
First you set up a simple ACD. You can also use a working ACD and edit it to make callback work.
To let the caller know they can choose to be called back, you add a sound file to the ACD settings. Therefore you should first record and upload a sound file with that message (you read more about soundfiles here).
In this example, the soundfile announces: “Press 1 if you want to be called back.” The configuration of key 1 will be done later.
This announcement will repeat every 45 seconds and in between the caller will hear his position in the queue.
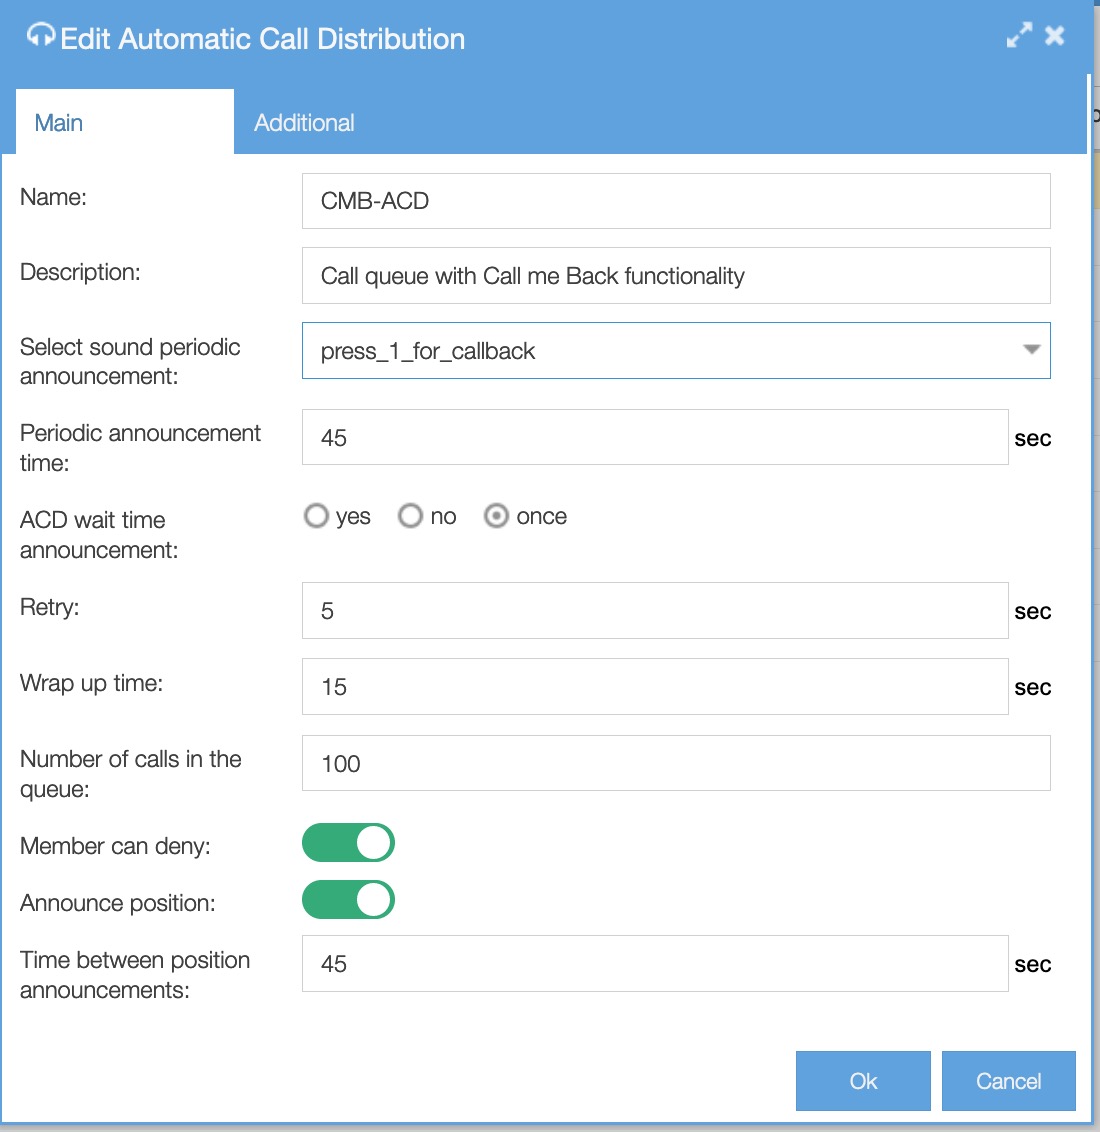
Click OK. We will return to the tab Additional later. For nowm the ACD is set up.
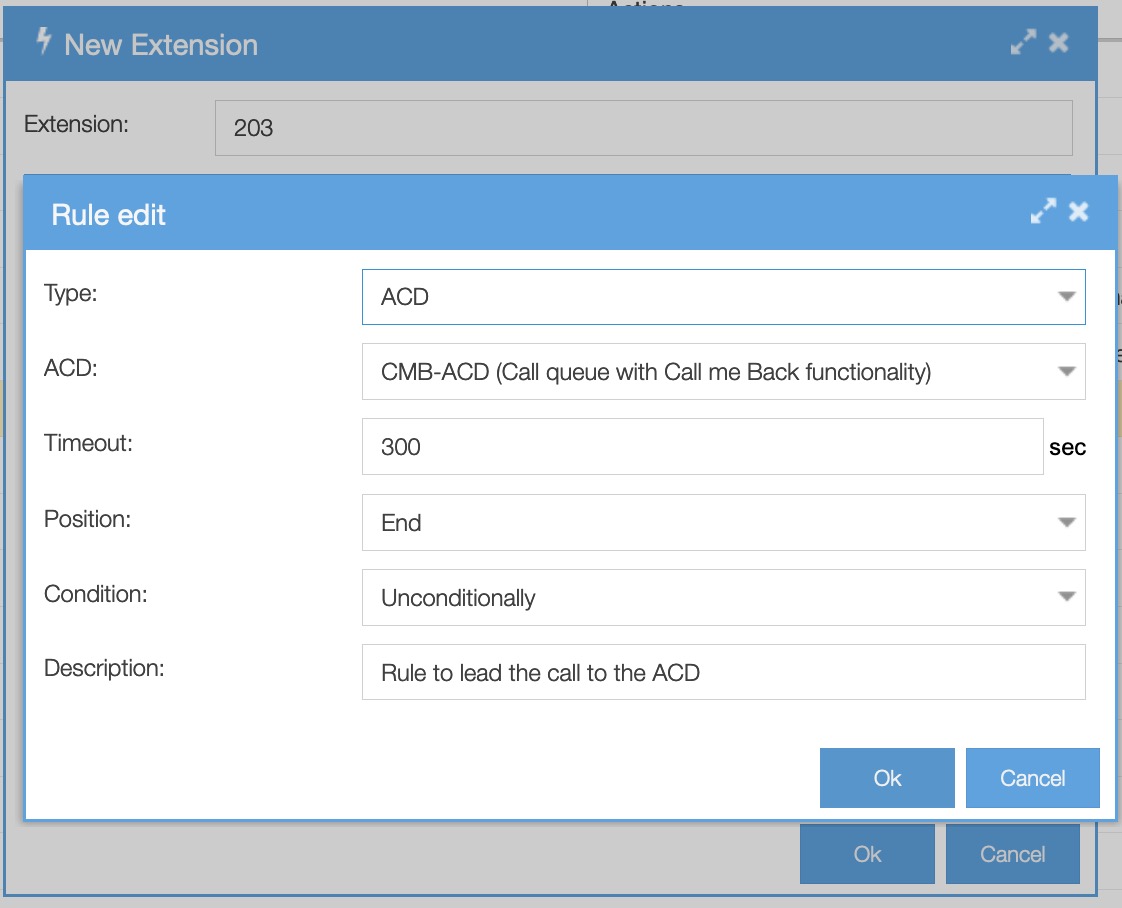
Add an extension
Now you add an extension, or you can use an existing extension, to link the ACD to.
In this example we add a type ACD-rule at extension 203 and we choose the ACD we set up in step 1.
Call Me Back setup
In Actions/Call Me Back you can now link the extension you just added. In our example to extension 203. Later on you will use the name you give here in the webhook-rule.

Setting up the IVR
Now we are going to set up the IVR that will be invoked from the ACD. It will get three options:
- Key 1 if the caller wants to be called back on the phone number he/she is calling from;
- Key 2 if the caller wants to be called back on a different phone number;
- Key 3 if the caller changed his mind and want to leave a voicemail-message or wants to hang up.
You will need a remote API-key, make sure you have copied this to your clipboard: go to System/Options/Remote API and copy the key,
You will need 4 different messages for the callers, so also make sure you have recorded and uploaded these custom sounds beforehand.
- The message: “Press 1 to be called back on the number you are calling with now, Press 2 if you want to be called back on a different phone number, or press 3 if you want to leave a message.”
- A sound file: “Your are calling anonymously, please enter your 10-digit telephone number.”
- The message: “Please enter you 10-digit telephone number.” and
- last but not least a file with the announcement: “Thank you, we will call you as soon as an agent is available.”
Now you can set up the IVR via menu Actions/IVR. Name the IVR and choose the sound file that announces the 3 choices.
Option 1
Option 1 is for callers who want to be called back on their current phone number. The pbx will see that number. However, there is the possibility that people call anonymously, and in that case the pbx cannot pick up a number. That is why we build in an extra check.
The anonymous caller
Add u rule of the type Webhooks.
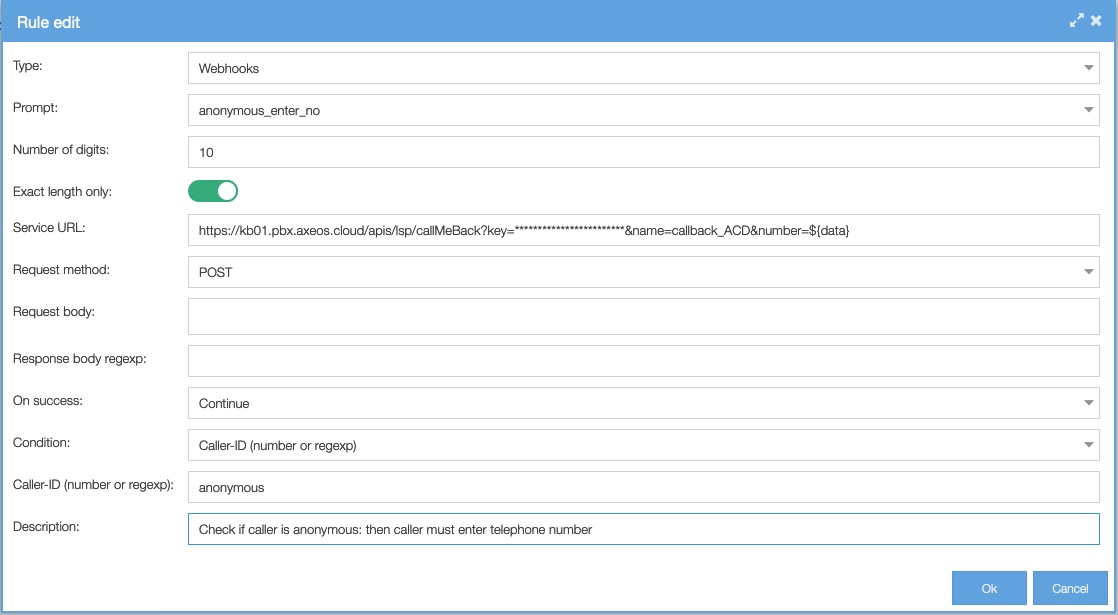
Prompt: choose the soundfile that annouces that the caller is anonymous and has to enter his/her 10-digit telephone number manually.
Digits: 10.
Exact Length Only: set to ON to make sure that only 10 digits make the rule work.
Service URL: type the following string:
pbx_url/apis/lsp/callMeBack?key=API-key&name=name_of_callMeBackcontext&number=${data}
On the italics you fill in your own information. You paste the remote API-key and the name of the Call Me Back Context you created earlier.
Make sure you use Capitals in callMeBack; it is case sensitive.
On Success: Continue
Condition: CLIP. In the CLIP-field you enter : anonymous. Meaning that if the condition Anonymous is met, the caller will hear the message to enter his/her telephone number.
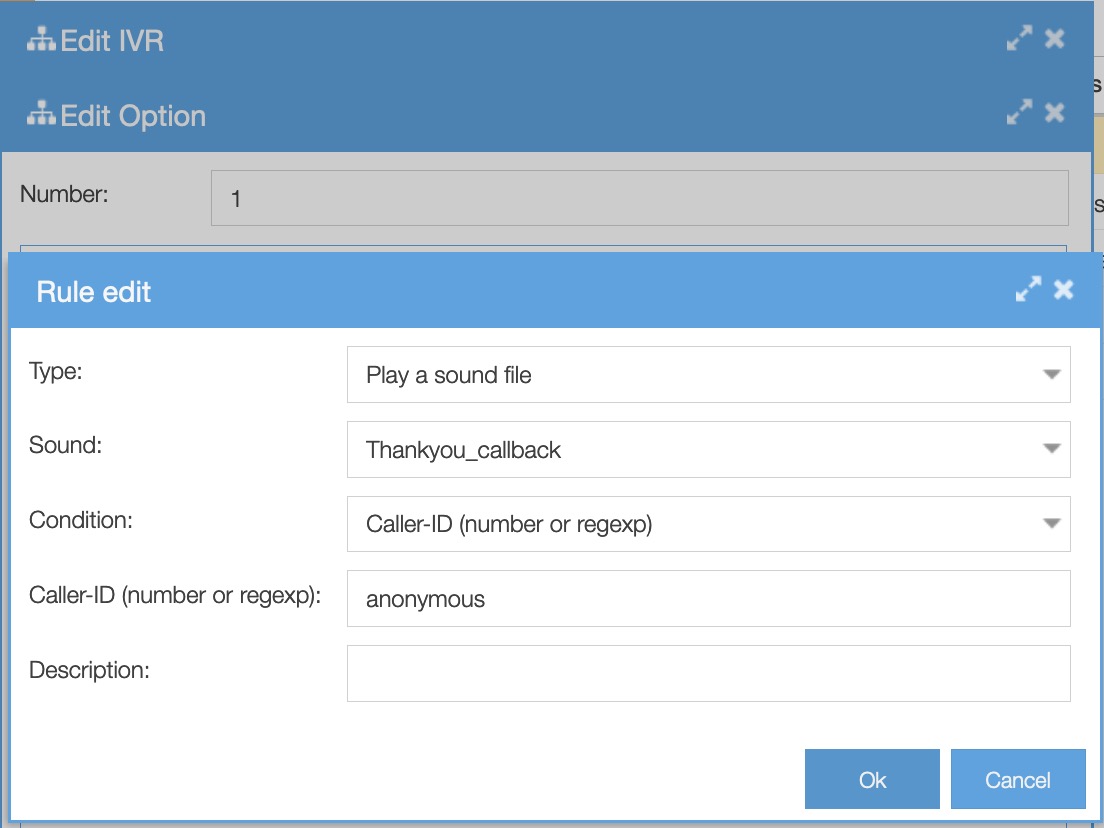
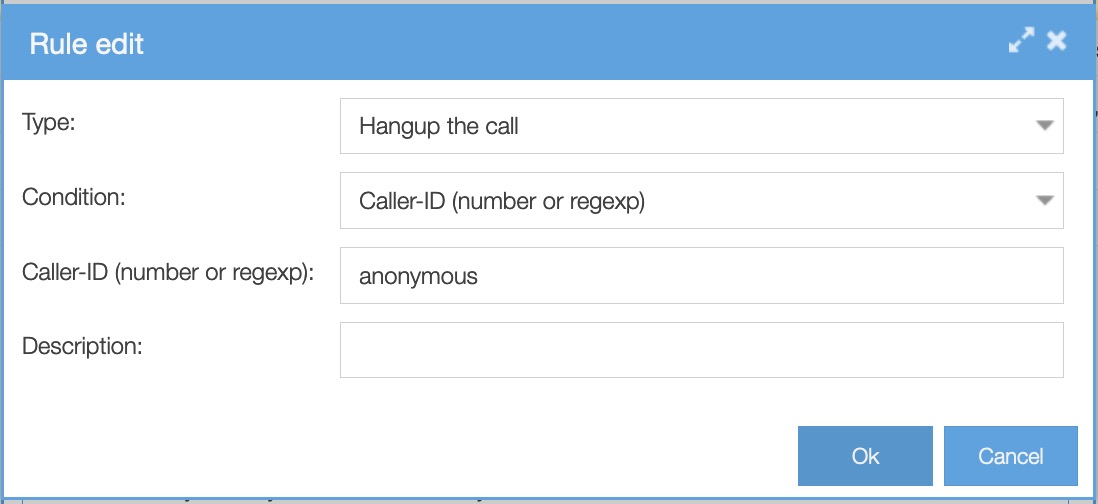
Now add a rule in which the anonymous caller will hear that he/she will be called back as soon as there is an agent available. This rule also needs the condition CLIP – Anonymous.
And, finally, you add a rule in which the call will be ended, with also the anonymous condition.
The caller with a visible number
Now we will make three almost identical rules, this time for the caller who does not call anonymous. The pbx will be able to use the phone number of the caller for the callback-action.
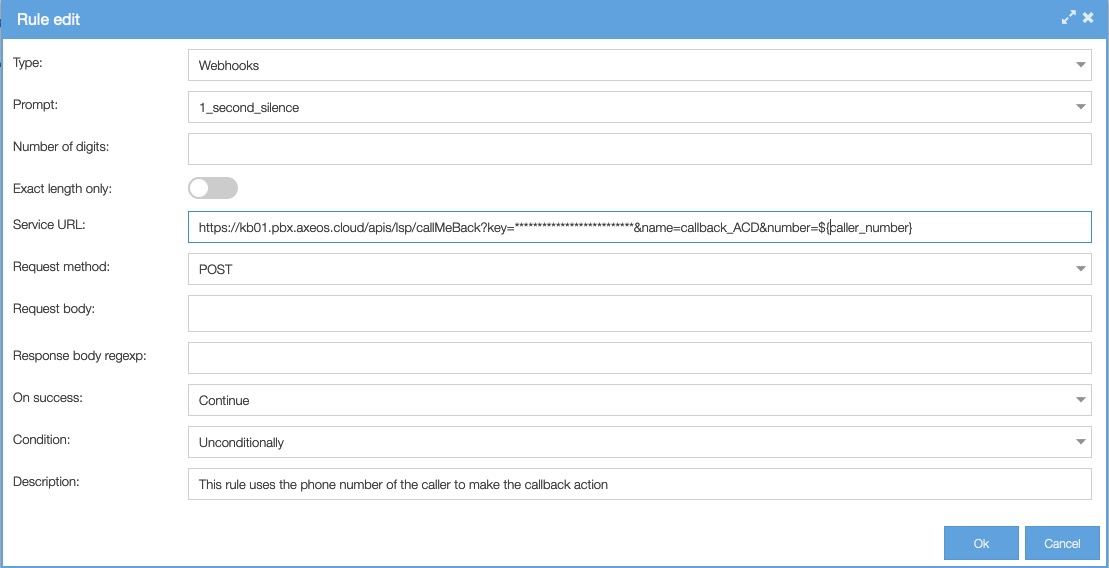
The service-url in this webhook-rule is slightly different:
pbx_url/apis/lsp/callMeBack?key=API-key&name=name_of_callbackcontext&number=${caller_number}
On the italics you fill in your own information. You paste the remote API-key and the name of the Call Me Back Context you created earlier. Make sure you use Capitals in callMeBack; it is case sensitive.
For all three rules, set condition to Unconditionally.
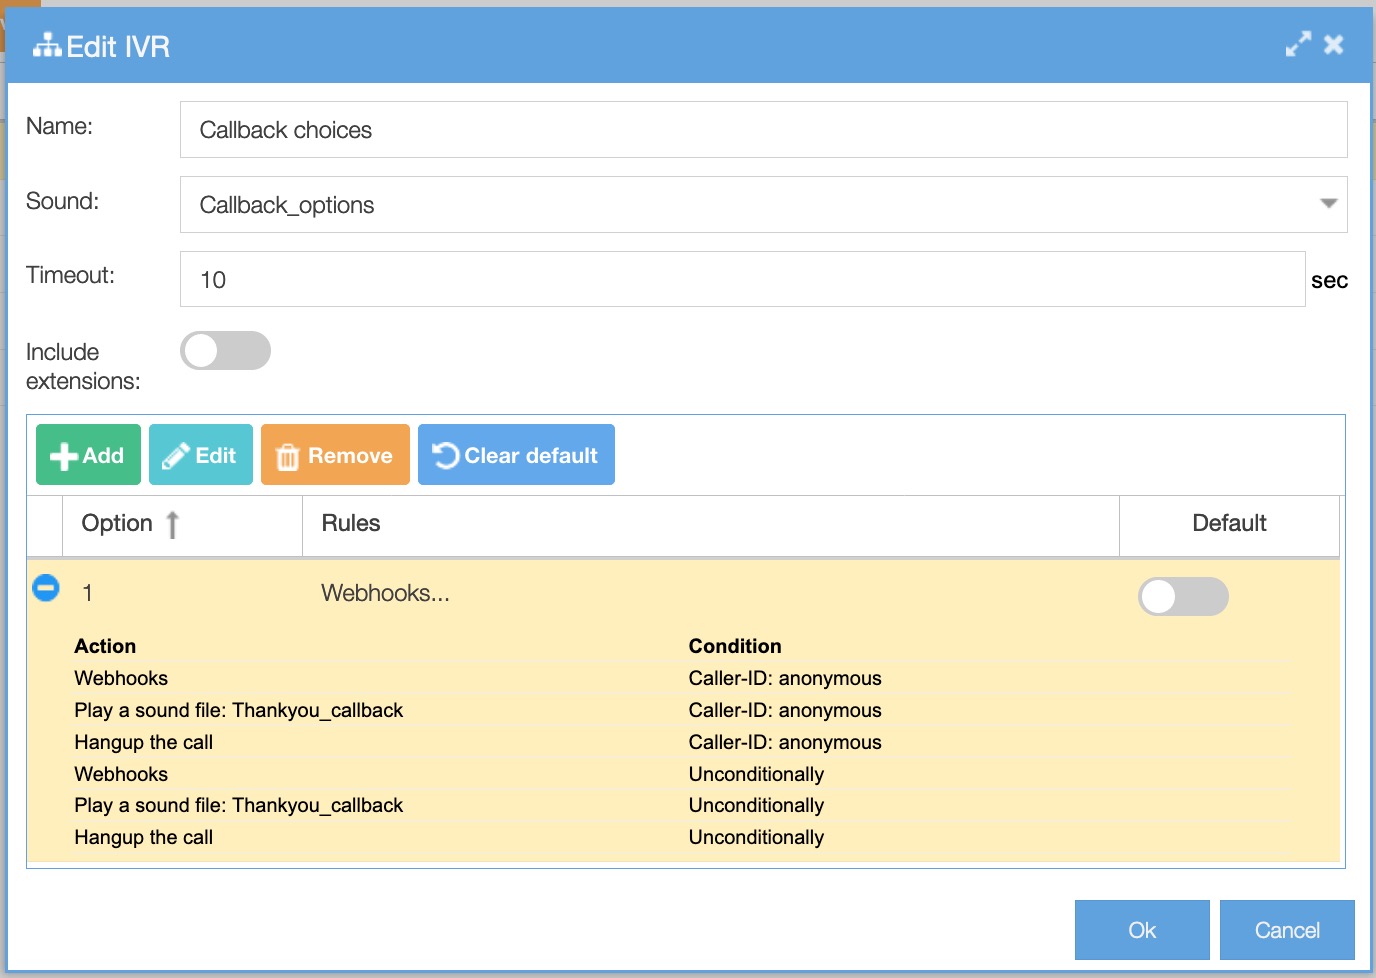
Option 1 in the IVR now looks as follows:
Option 2
We will now configure option 2. This option is for callers who want to be called back on another phone number than the one they are calling with now. For instance because they want to be called back on their mobile.
The rules to create are almost identical to the ones at option 1. Use the same rule as for the anonymous caller but select a different soundfile: “Enter your 10-digit telephone number.” Set condition to Unconditionally.
If also the other two rules have been added, option 2 looks as follows:

Option 3
To give the caller the opportunity to not being called back, we add the option to leave a message. It looks like this:

The IVR is ready. Click OK to save it.
Finish setting up the ACD
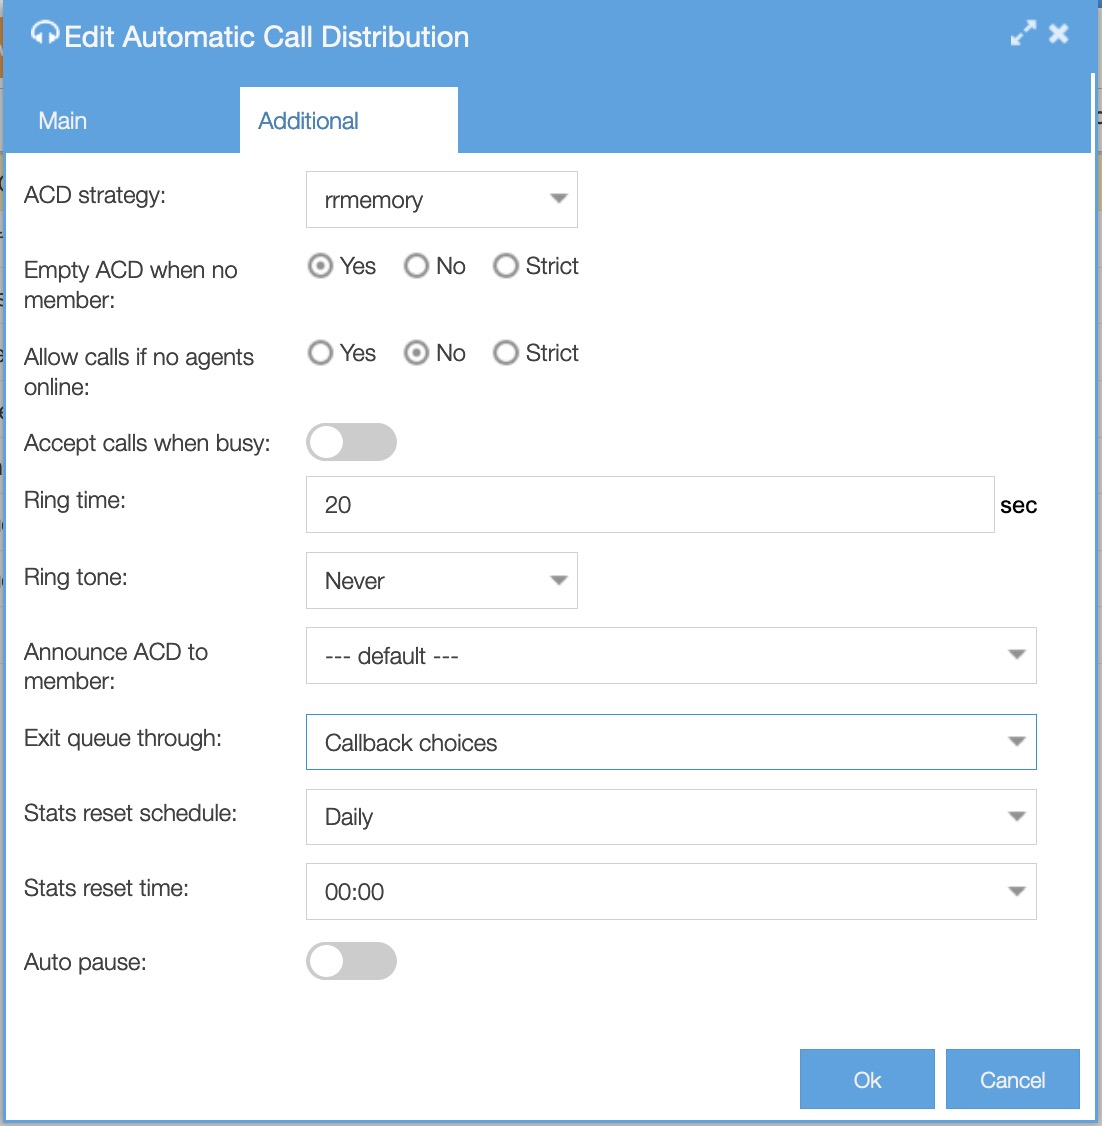
Now that the IVR is ready, we can continue setting up the ACD we created earlier. Go to your ACD and go to the tab Additional.
We leave all the default settings for what they are; we only fill the field ‘Exit queue through’ with the IVR we just created. This means that when a caller presses 1, the call will leave the ACD and will be transferred to the IVR. The caller will hear the message set in the IVR.
Click OK.
Now add member to your ACD by using the button ‘Agents’.
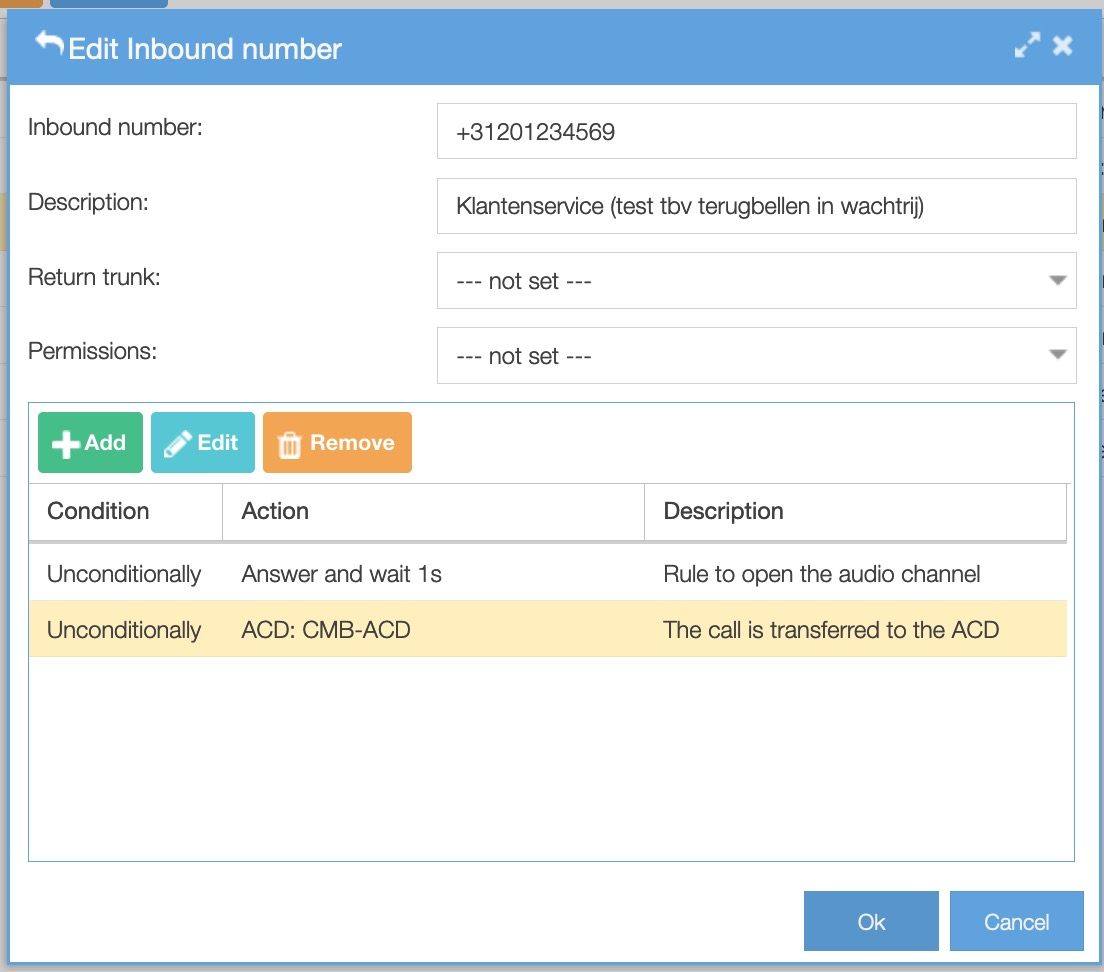
Set Inbound
We are now almost to the end of setting callback in the call queue. Inbound has to be set up.
Go to Dial Plan/Inbound. Choose er create an inbound number to which you want to link the ACD. For instance the telephone number of your support line or customer service. We will make a simple dial plan for the purpose of the example. Off course you can add different options to fit your dial plan to your organisation.
The first rule will open an audio channel and the second rule transfers the call to the ACD with the callback option.
Edit the firewall
With the Call Me Back-action, your pbx will be invoked externally. Therefore you will need to add a rule to your firewall to allow the address of your own pbx.