With the Zendesk connector you can connect your PBX with Zendesk. It enables you to display a customer’s contact information and open tickets when he or she calls you. This way you will have all necessary information ready at the moment you take the call.
This article describes how to configure the right settings so your ZD account and the UCM connector work together.
Prerequisites
Your Axeos pbx-license needs to allow the use of the connector. Contact your supplier for pricing and to have the connector enabled.
Step 1. Getting your Zendesk Oauth access token (API token)
Log into ZD with an account that has sufficient authorisation to view/create API tokens.
Then, in Zendesk, go to Admin > Channels > API.
Step 2. Install UCManager
Run the UC Manager setup file (which you can find here) in order to install the UC Manager.
Step 3. Configure UCManager
In UC Manager > settings > connectors tab, tab the switch to enable ZD integration and enter the following details:
- Subdomain: your zendesk subdomain, e.g. mycompany if you log into zendesk through https://mycompany.zendesk.com. Do not enter the FQDN, only the subdomain itself;
- Email: the e-mailaddress associated with your zendesk useraccount;
- Authtoken: the API token you retrieved from the Admin > Channels > API menu in Zendesk.
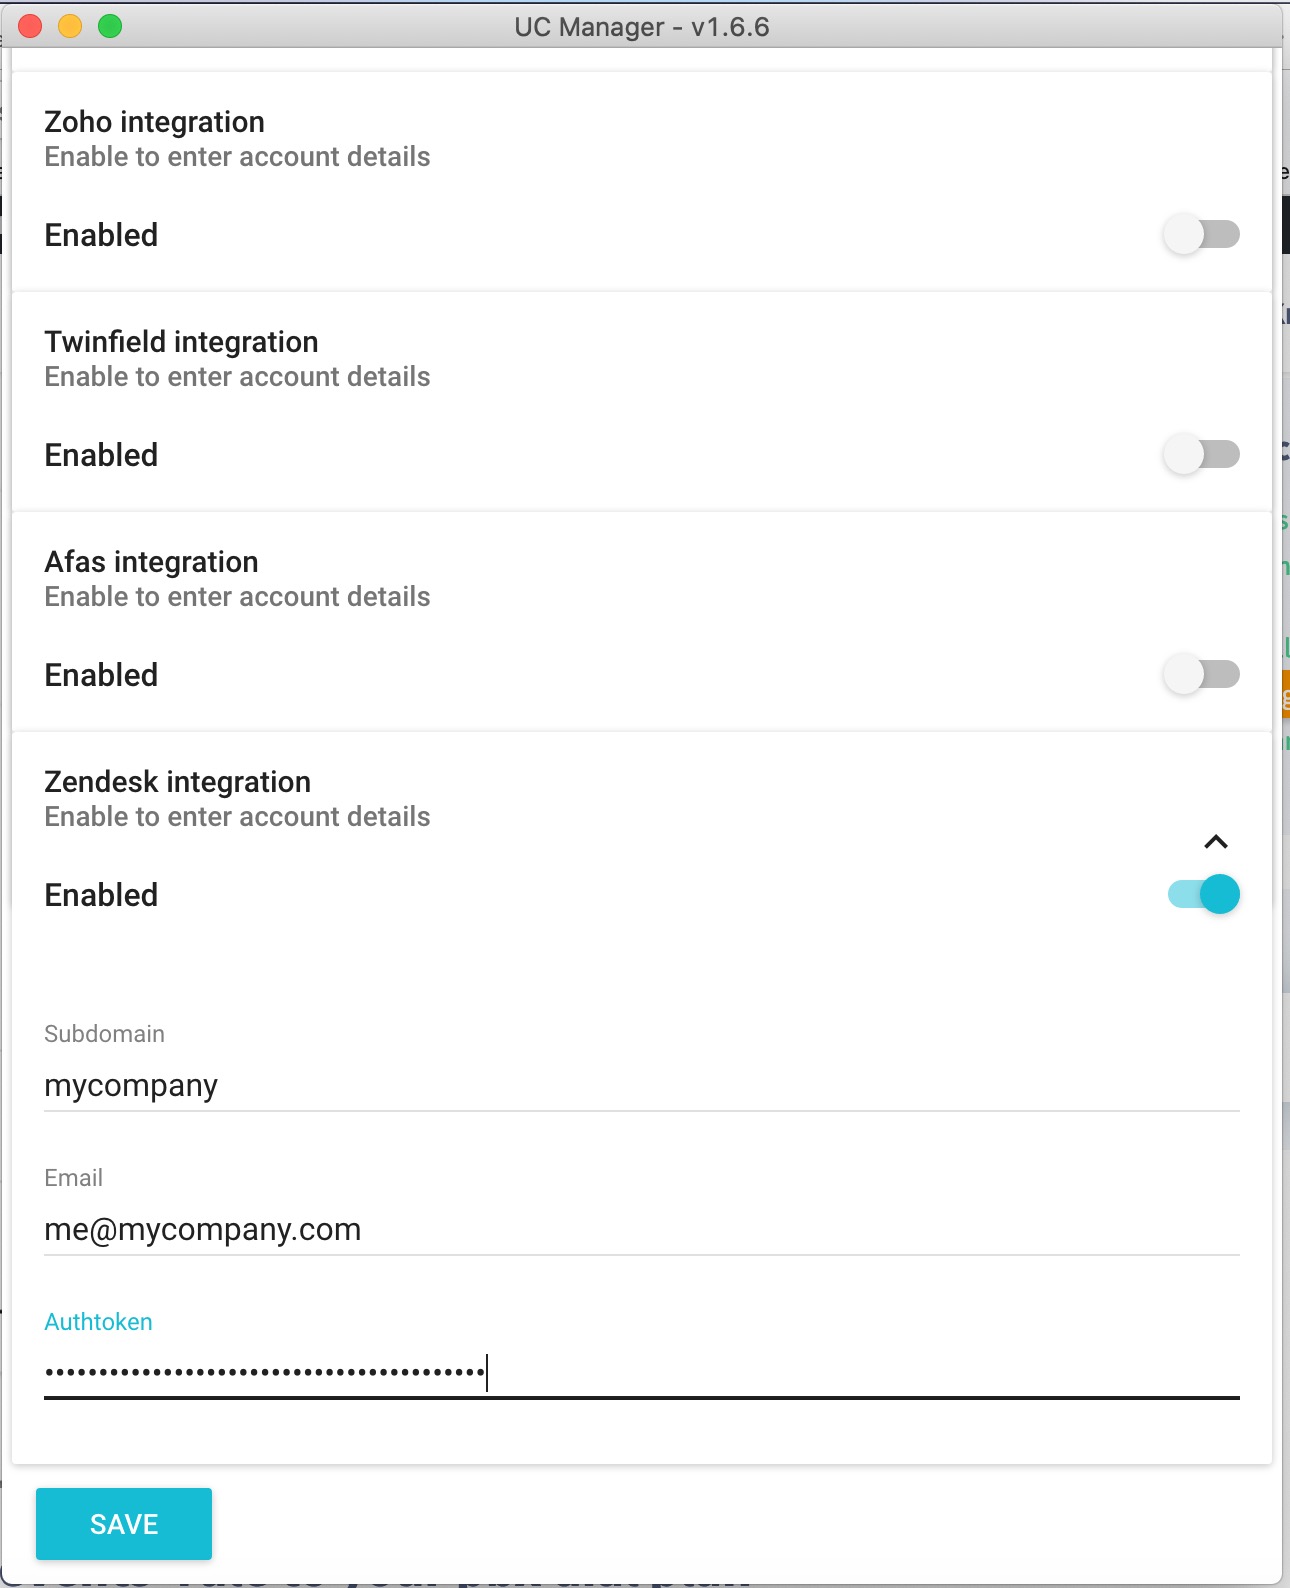
Press SAVE.
Step 4. add an ‘API events’ rule to your pbx dial plan
To have the UC Manager generate a popup on inb0und calls, you will need to add a rule ‘API events’ to your dial plan, where you want to trigger the pop-up.
