The user manager is where you control users access to various PBX functions and interface access. For very basic functionality you could do without users, but we recommended to do so, because users offer all the advanced functionalities in the pbx.
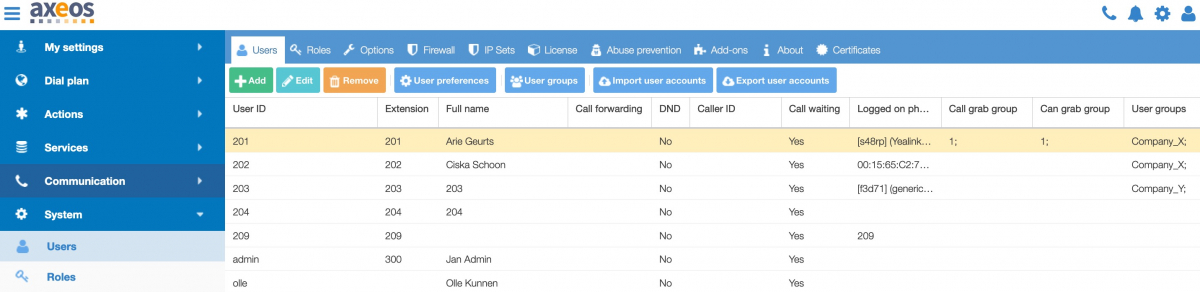
The user “admin” always exists and cannot be deleted. This prevents a lock-out of your own system.
Adding or editing users
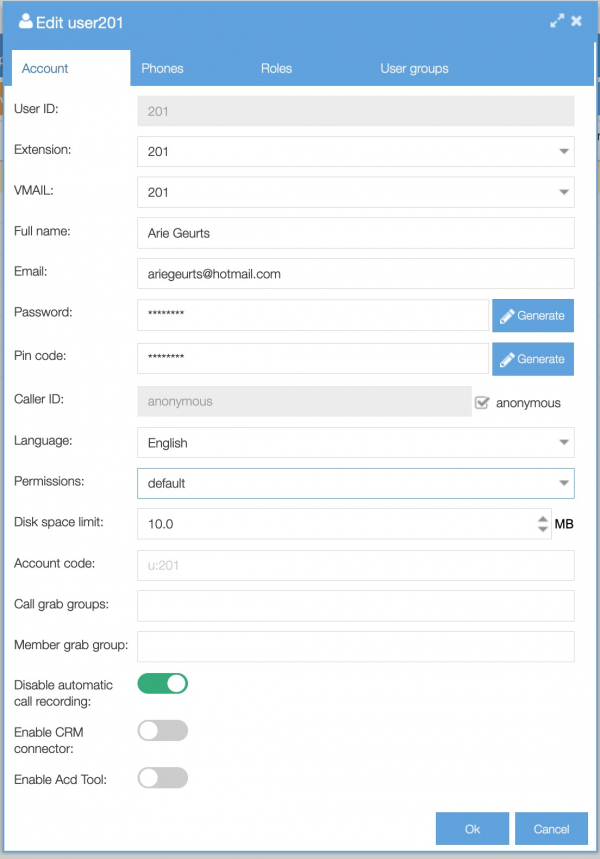
Account tab
-
User id: the userID to log on to the user interface and to be used with hotdesking. It is usually the easiest to make this a number as you can enter it easily on a phone dialpad;
-
Extension: the user can be bound to an extension, which gives extra functionalities, for instance Switches;
-
Vmail: if you want to set a personal Voicemail box, set it it here;
-
Full name You may want to enter the user’s full name;
-
Email: set email address to send voicemail messages to, send a message when the “forgot password?” feature is used. Please note that if you do not enter an email-address here, the user will have to contact admin in order to regain access in case of a lost password;
-
Password: set the web interface password for this user, use generate to create a safe password that meets security best practice;
-
PIN code: numeric code to access voicemail and/or hotdesking;
-
Callerid: set callerid for this user. Leave empty to use the system value. Or set anonymous to force anonymous dialing;
-
Language: set language for the voice prompts;
-
Primary phone: Use this phone as a default if not logged on, or no hotdesking is used;
-
Permissions: choose Permission profiles, use default to have no permissions;
-
Disk space limit: if you can use call recording (HD must be installed), then allow this user the maximum size in MB of disc space for recordings
-
Account code: The account code set will show in the CDR;
-
Call grab groups: a semicolon separated list of which grab group this user is part of. Note that this is not the same as a pickup group. Using the grab groups allows you to grab a call from the web interface (Mysettings/calls) where the pickup group (set in Communication/Phones) allows you to pickup a call using *8 from your phone.
-
Member grab group: a semicolon separated list of groups this user is allowed to grab calls (via web interface) and place it to his/her phone
-
Disable automatic call recording: exclude this user from unattended call recording;
- Enable CRM tool: for use with the desktop client (UC Manager). If you have installed UC Manager on your desktop and you want to connect to your CRM, you should enable this switch for the user.
- Enable ACD tool: for use with the desktop client (UC Manager). If you have installed UC Manager on your desktop you should enable this switch for the user to be able to see ACD status and agent settings.
Phones tab
In the Phones tab you can set the phones and the numbers for the user.
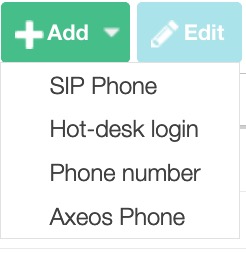
When you click Add, you can choose which option you want:
- SIP Phone: a SIP-phone (can be a phone or for instance a SIP door-intercom)
-
Hot-desk login: Allow the user to do hot-desking: log on to a random phone when using flexible workspace.
-
Phone number: An external phone number (e.g. your mobile phone number or home landline) that can be used to receive incoming calls on, and to use when dialing out via the LSP/UC app quick dial. Be aware when using ACD’s that a users’s external Phone Number will only ring when the user is an agent if the agent has an available SIP Phone as well (as the external phone’s presence cannot be monitored for availability).
- Axeos Phone: A SIP account for use with our Android/iOS softphone (read more).
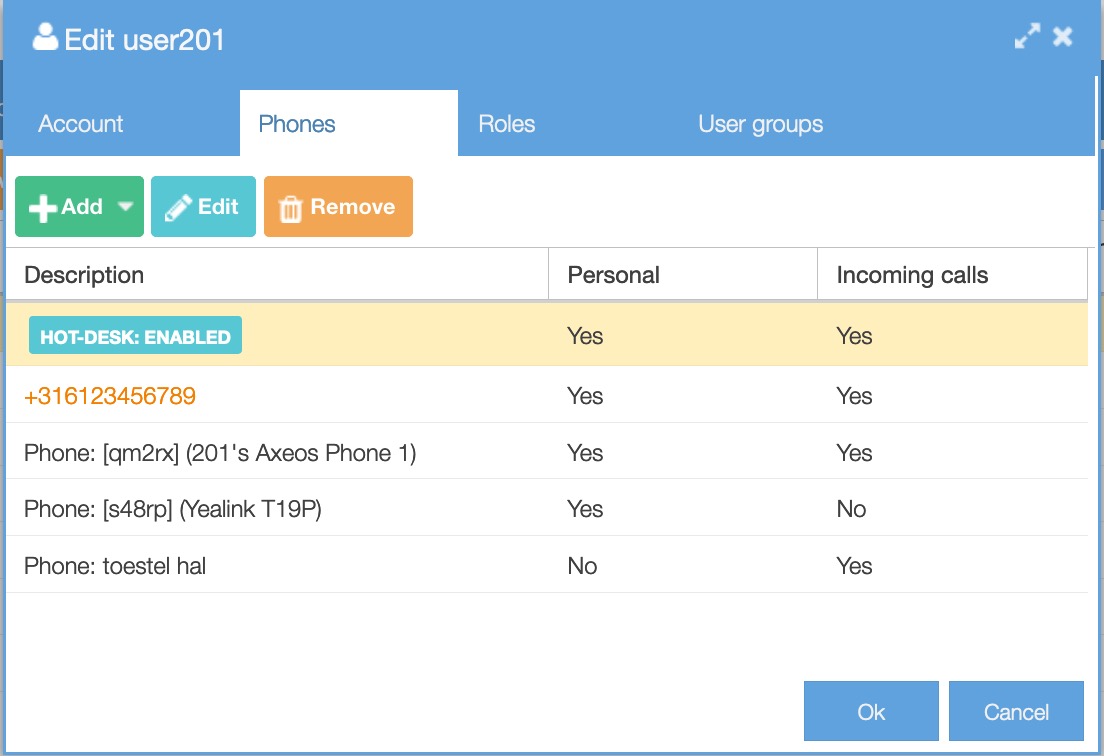
- ‘Personal device’ option can be set for a SIP phone or ‘a number on a trunk’ with caller-id mapping. A phone set as a ‘personal’ of one user cannot be assigned to any other user. A phone with hot desking enabled cannot be set as a personal device.
- ‘Incoming calls’ can be set (on/off) for the users phones, to choose wether or not incoming calls should be recieved on certain devices.
On an inbound call, the users phones (those with ‘incoming’ set to ON) will ring, regardless of them being marked ‘Personal’. This setting is important when you call outbound //from// the phone. The connection needs to have proper caller-id assigned and this would be impossible to choose correctly if the phone belongs to multiple users. Only a single user can have a phone as ‘personal’, so his caller-id will be used.
Removing a personal phone from a user will (on confirmation) remove that user from all ACD queues.
Roles tab

Assign roles to this user. You can create roles in system/roles.
User groups tab
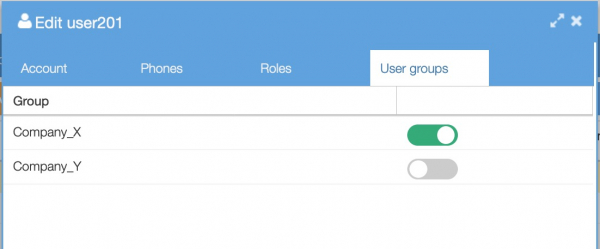
You can assign a user to more user groups if they exist. You create user groups in this menu option, see below.
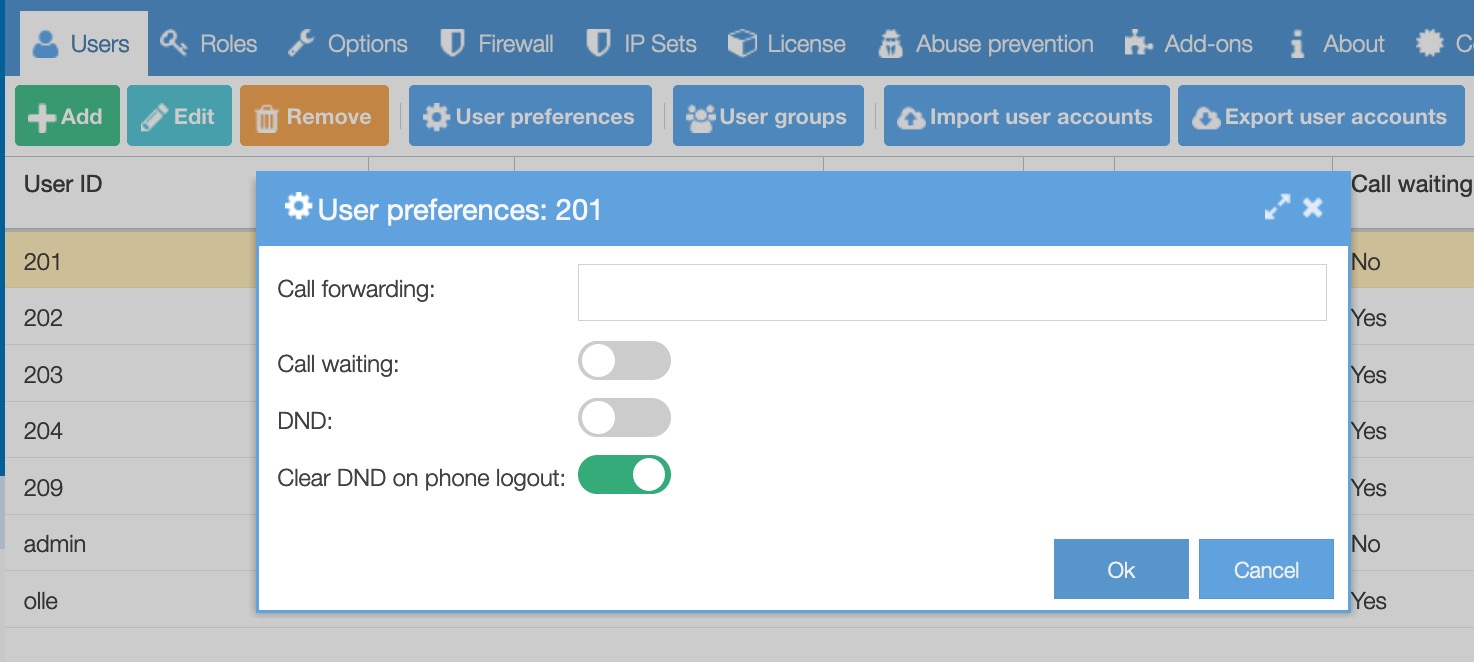
User preferences
The user can also set these preference himself in My Settings/Details.
-
Call forwarding: force call forwarding for this user. Note that call forwards are ignored for calls originating from a call group.
-
Call waiting: accept two or more calls on your phone at the same time, by default enabled. Set to off to force a busy on the second call coming in.
-
DND: enable Do Not Disturb (DND) for this user. Give busy on any incoming call, default value disabled.
-
Clear DND on phone logout: when enabled the DND settings will be cleared upon logging from the phone. Default value is disabled.
Please note that when a user has set a call forward to a mobile phone, the pbx trunk phone number will be displayed. This is intentional behaviour as external SIP providers may refuse calls when the PBX keeps the caller-id of an external incoming call when forwarding it outbound.
User groups
You can create user groups to set up multi-tenant functionality. The group name is a label under which various functions can be assigned to one or more user groups (Call groups, Outbound trunks, Custom sounds, Phones and Time rules)

Import user accounts
Use an export as a base file for your import data. Import the users account data in bulk using the exported file as example. Not all fields need a value but all fields must exist or the import will fail.
Please be aware that Microsoft Excel seems to have a habit of making changes to CSV files without asking you; e.g. adding quotes or colons where there were none in the original files. Other editors like Libre Office, Sublime Text, and Notepad++ seem to do a much better job at editing csv files.
If your import fails, compare your file to an original export file and look for differences.
Export user accounts
Export a comma separated values with double-quote texts delimiter which can be edited in a spreadsheet or other editor. Use this to as a base for a new CSV file to upload all users. This allows one to edit user data in bulk instead of using the GUI only.