
If you are experiencing issues with certificate configuration or selection and you are using an ad blocker in your browser, please disable the ad blocker.
It is possible to create or import your own certificates used for HTTP or FTP server authentication or (from 4.1.0) call encryption.
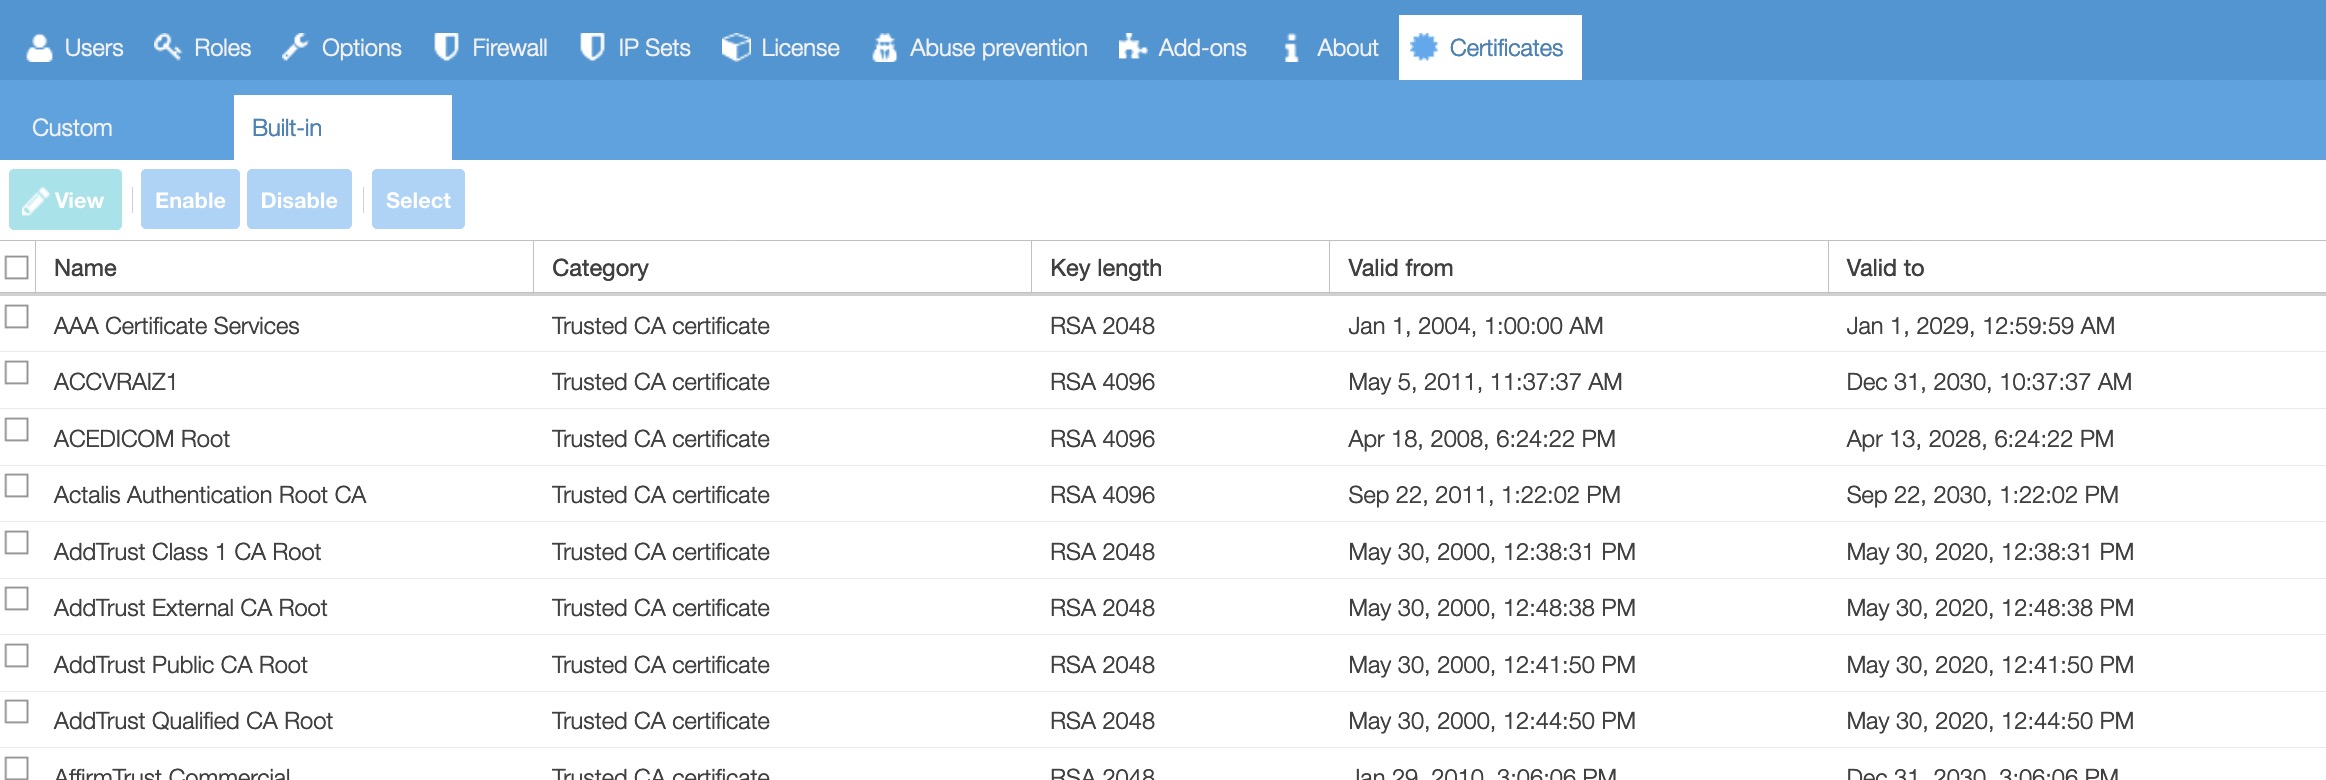
Certificates on the list can be enabled or disabled, you can enable/disable multiple certificates at once.
The built-in certificates provide a trusted certificate list. These certificates are enabled by default.
Creating a self-signed certificate (no third-party validation)
There are situations where you can create your own self-signed certificate; machine to machine connections or if the certificate comes bundled in an installation package for instance with a VPN-profile.
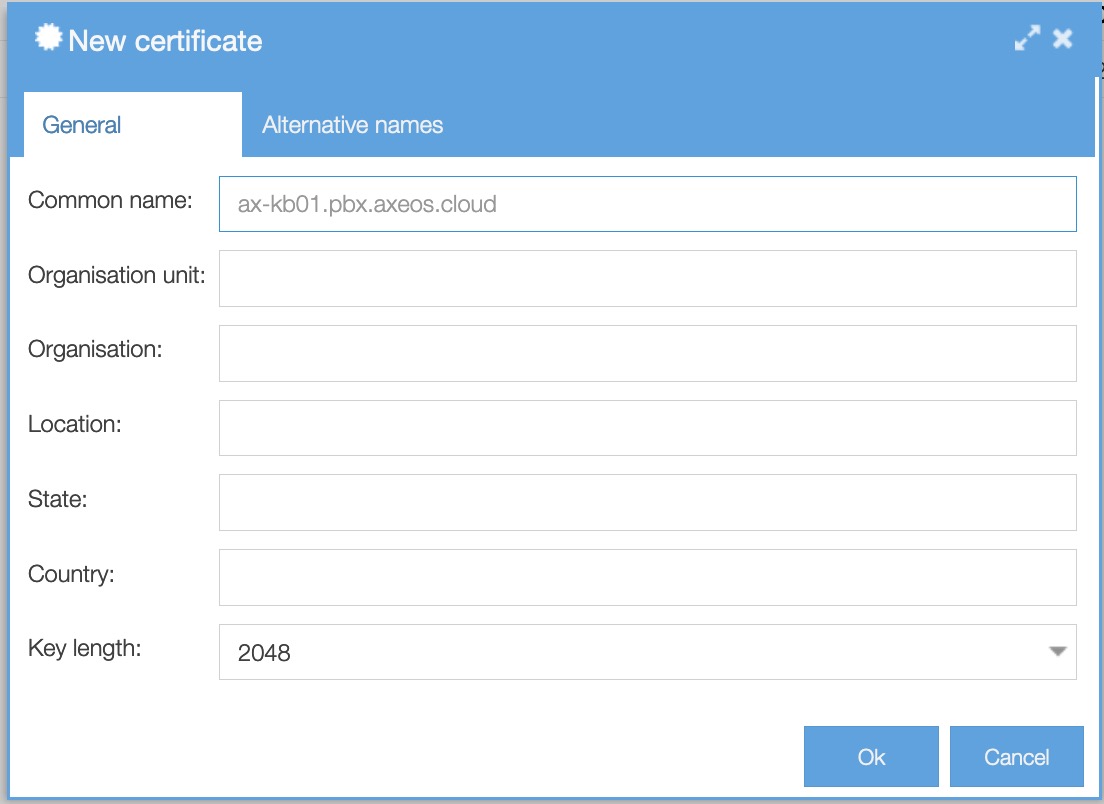
To create a self-signed certificate click on the green button Certificate → Create.
-
Common name: set custom certificate name. It should be a fully qualified domain name of the PBX, as used by the remote clients
-
Organization unit: set company unit (optional)
-
Organization: set company name (optional)
-
Location: set location (optional)
-
State: set state (optional)
-
Country: set country (optional)
-
Key length: you can choose between 1024, 2048, 3072, 4096. The default is 2048.
Certificate import
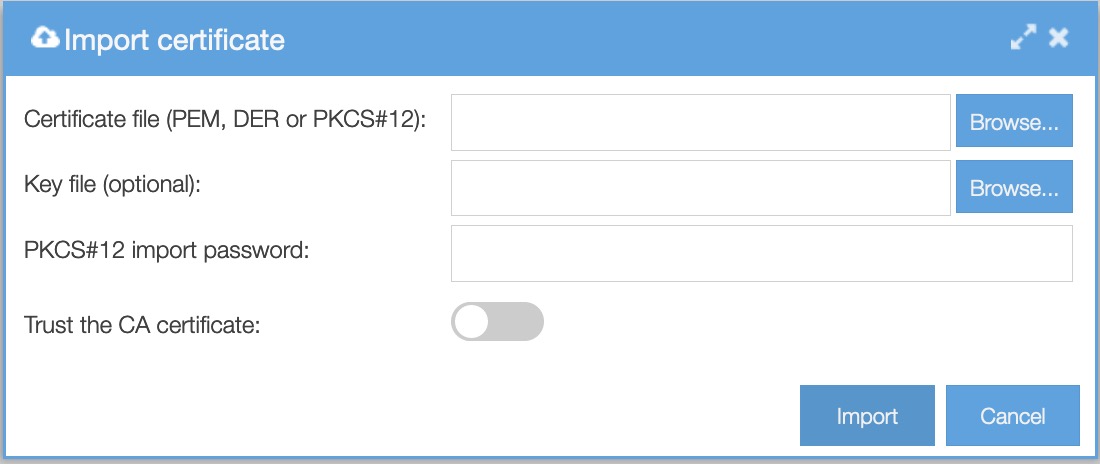
To import a certificate signed by a certification authority, click on Certificate → Import.
-
Certificate file: PEM, DER or PCKS#12 files are supported.
-
Key file (optional): unencrypted PEM-encoded private key for a PEM certificate
-
PKCS#12 import password: passphrase for a PKCS#12 certificate
-
Trust the CA certificate: enable importing a trusted CA certificate
Request a certificate
From version 4.1.0 you can request a free third-party validated certificate from Certificate Authority Let’s Encrypt. We have automated the whole process. These certificates, once succesfully requested and installed, will get automatically renewed.
Before requesting a certificate from Let’s Encrypt please check:
- Your firewall settings: TCP port 80 needs to be open to 0.0.0.0/0 for automatic certificate renewals to work. This is due to the fact certificates are free at Let’s Encrypt. This means you have to limit all services on port 80 so it will not be available to the world. You should still use the ‘force HTTPS’ option and access rules in System/Options/Network servers to further limit access through the web interface (those limits do not apply to Let’s Encrypt challenges). If you cannot or will not open port 80, we advice you to buy a third-party certificate from a commercial service.
- Always use strong passwords (‘welcome1’ or ‘password’ are not strong passwords) and we highly recommend using the IDS (Abuse Prevention).
- Check your PBX Address setting in Communication/Phones/Global Settings and change it if necessary.
Step 1. Domain
Choose the certificate provider. There are three options to choose from:
- Let’s Encrypt
- Let’s Encrypt (staging) – this is for testing only.
- Custom (pick your own provider, e.g. Comodo, GeoTrust, Thawte, GlobalSign)
Enter a provider URI (only necessary if you chose ‘custom’ in step 1).
Enter a domain (FQDN). Your domain must resolve to the pbx IP address or your request will fail. From pbx version 4.1.3 you can add additional domain names to the certificate.
Enter a valid contact email address. This address will only be used for certificate request validation purposes.
Click ‘Next’ to proceed to step 2.
Step 2. Accept ToS
Read the terms of service and, if you agree, accept the terms and click ‘next’ proceed to step 3.
Step 3. Finish
You now have a valid certificate.
Certificate renewal
Are you having trouble with certificate renewals? Check if you are running 4.1.3 (or older) firmware. A recent change in the Let’s Encrypt API broke our implementation. Update your pbx to solve this.
From release 4.1.8 the PBX will renew your Let’s Encrypt certificate automatically when it has a third of its total lifetime left. For Let’s Encrypt’s current 90-day certificates, that means 30 days before expiration.
If certificate renewal fails then a new attempt will follow 12 hours later, and so on. After the 4th failure to renew you will recieve an email from the vpbx (if you’ve entered SMTP settings) to let you know you need to check your config and renew the certificate manually. Also a notification in the web interface is shown to users that have the admin role.
This leaves you with another 28 days to complete the manual renewal process before the certificate expires.
Concerning certificate renewals it’s important to know the following:
- The active (bold, selected) certificate will be renewed. Inactive onces that have not expired yet will not.
- When certificate renewal fails the pbx will try to renew it again after 12 hours up to a total of 4 attempts.
- When all certificate renewal attemps have failed the pbx will send out an e-mail to the address set in System/Options/Mail and SMTP/System notifications. If you have not filled out SMTP settings the pbx can not alert you by email.
- Renewal itself does not require human intervention. When the renewal process succeeds the old certificate is removed and new one is being selected automatically in the pbx.
- Renewal takes place 30 days prior to the certificate expiration date.
- After renewal your phones need to re-register to work with the new certificate.
Certificate renewal failed-what do I do now?
Most likely you didn’t open port 80 (instructions). Check this, make sure it is, remove the existing LE certificate and then simply request a new one.
Downloading certificates
You can download a certificate if you e.g. want to bypass the zero-touch auto-provisioning and do provisioning the old-fashioned way.

Select the certificate you wish to use and continue to click “view”. Click “download” and choose the PEM encoded file.
Caveat: Changing the selected certificate requires reloading asterisk (status/services) on your PBX if you have enabled call encryption in communication/phones global settings tab encryption.
I want to generate a CSR to buy a certificate-how do I do this?
Go to System/Certificates in the web interface. You can generate a self-signed certificate that includes the correct common name (on that resolves; matches your A record) if you have not yet done so. If you have you can skip steps 1 to 5.
- Click the green ‘Certificate’ button
- Choose ‘create’
- Fill out the necessary fields
- Click OK.
- You now have a new self-signed certificate.
- Click on the certificate
- Click ‘view’
- A pop-up shows this certificates details. You’ll see a ‘download’ button below. Click it.
- Choose ‘Certificate Signing Request’
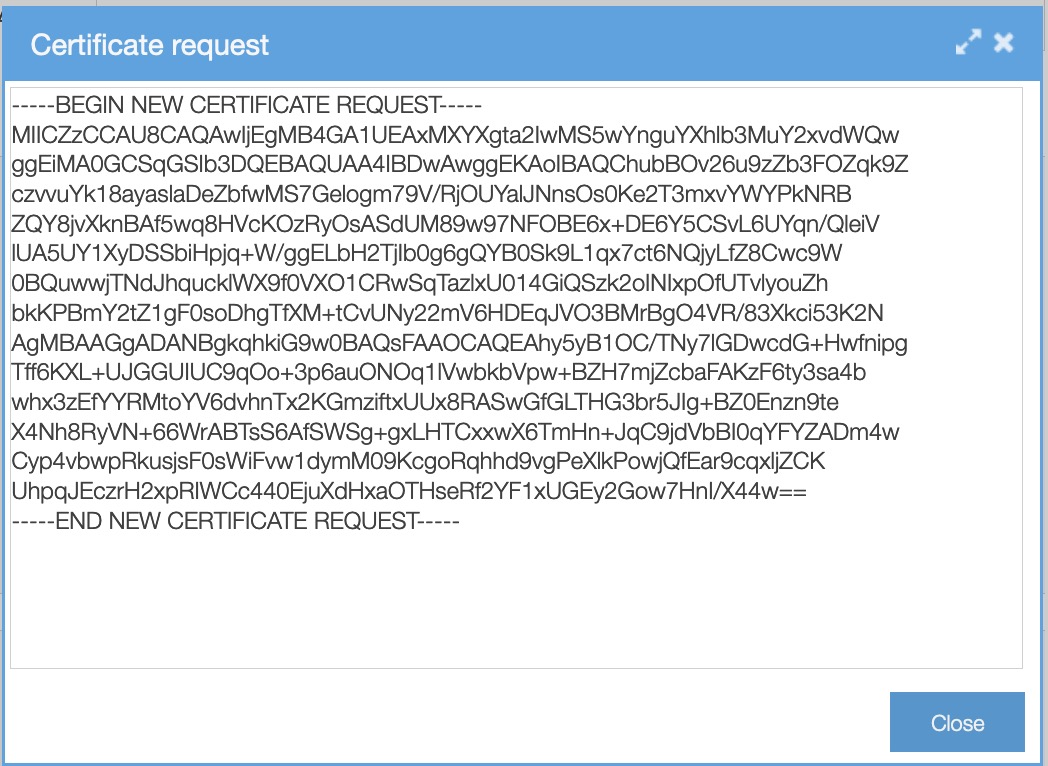
Copy the Certificate request-text and paste it in a file or E-mail. Mail this to your certificate authority. If the authority honors your request, it will return a valid and signed certificate. You can import the certificate (see above how this works).